Small Space Storage
Best Entryway Shoe Storage for Small Spaces
An entryway shoe problem is usually a circulation problem first. A rack can hold more pairs and still be wrong if the front door, closet door, stroller, mobility device, bags, or normal walking route cannot move around it.
Measure the entry while every nearby door is open, then count only the footwear used in the current week. Seasonal shoes and occasional pairs usually belong in another storage zone.
Editor
SoloFave Editorial Team
Updated
July 2026
How we picked
Door-swing clearance, walking depth, daily-pair capacity, stability, anti-tip requirements, boot fit, wet-shoe management, cleanability, and renter suitability.
Quick answer
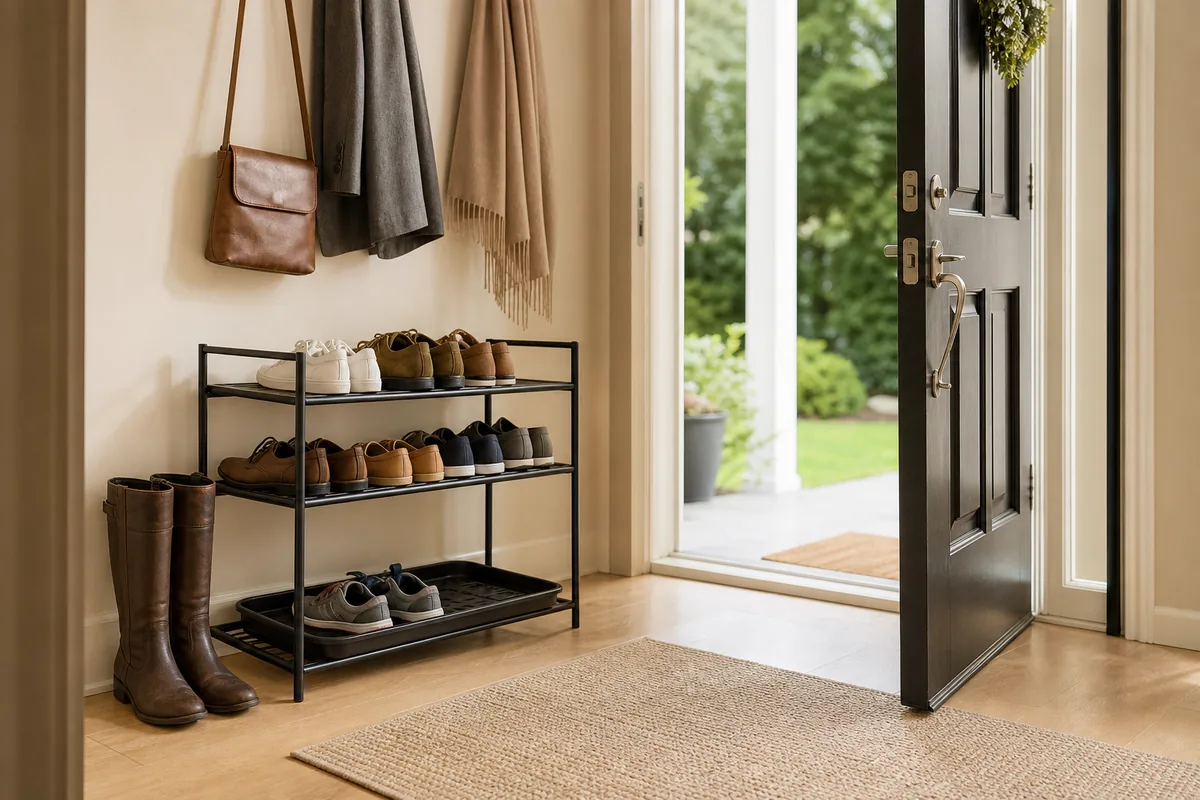
For a narrow entry with clear door and walking space, start with a slim freestanding shoe rack sized for daily pairs, stable in normal use, and paired with a removable tray for wet footwear.
Recommended first
The SoloFave Pick
The one solution we would try first for this specific problem.
- Product type
Slim freestanding shoe rack
- Difficulty
- Easy
- Why this pick
- It keeps current daily pairs visible and off the walking surface while using less depth than a bench or full cabinet, provided the unit remains stable and the door path stays clear.
Best For
- Small apartment entries with measured door and walking clearance.
- Daily footwear for one or a few people rather than the household's entire shoe collection.
- Shoes that fit the real shelf depth and spacing without projecting into the path.
- Renters who want movable storage and can follow any required stability instructions.
- Entries where a removable tray or mat can manage wet-weather pairs.
- Households that can place tall boots on a suitable open level or separate tray.
The Problem
Entryway measurements need to include movement. The front door may swing inward across the storage zone, a closet door may open toward it, and shoes can extend beyond the rack. Measure the rack plus the footwear at its deepest point, not only the empty frame.
Slim and tall units introduce stability questions. A narrow rack should remain steady when one shoe is removed, when weight is uneven, and when people brush past it. Follow assembly and anti-tip instructions; if required restraint cannot be installed correctly with permission, choose a lower or deeper option.
Footwear also changes the design. Tall boots need vertical clearance, wide shoes need shelf depth, and wet or salted footwear needs a washable tray and room to dry. An enclosed cabinet can hide shoes but may be less suitable for wet pairs without appropriate ventilation and cleaning.
Why this is our one pick
- Open shelves make the current footwear rotation easy to see and return without opening drawers or doors.
- A slim profile can preserve more walkway depth than a bench or traditional cabinet when measured with shoes loaded.
- Freestanding storage can move with a renter and avoids making wall mounting the default.
- A separate washable tray can handle wet pairs without asking every shelf to collect water, salt, or dirt.
- Occasional shoes can move to the under-bed storage guide, while the small-apartment storage guide handles the wider zone plan.
Entryway Options We Compared
Tilt-out shoe cabinet
A shallow cabinet hides shoes, but the doors need opening clearance and the compartment dimensions may not fit boots or larger footwear. Tall models can require anti-tip restraint.
Storage bench
A bench adds seating but often uses more depth. It works when the entry has enough width and when the compartment ventilation and shoe fit suit the household.
Over-door organizer
This preserves floor space but can affect door clearance, trim, hinges, and appearance. Pocket dimensions also limit bulky shoes and boots.
Open basket or tray
A tray is useful for wet pairs and a basket can hold light slippers, but mixed shoes quickly become a pile. They work better as supporting pieces than the main daily rack.
Wall hooks or hanging storage
Wall storage may suit lightweight accessories, not every shoe type or load. Use the lightweight no-drill guide before attaching anything to a rental surface.
Limitations and who should skip this
- Entries where any floor unit blocks the front door, closet, electrical panel, heating register, stairs, or required path.
- Very narrow racks that remain unstable after correct assembly and loading.
- Tall units requiring anti-tip restraint when correct anchoring is not permitted or possible.
- Large household shoe collections that need a closet or dedicated storage zone.
- Wet footwear when there is no washable drip tray, floor protection, or drying space.
- Tall or wide boots that do not fit the stated shelf spacing and depth.
- People who need fully concealed storage and appropriate ventilation for damp shoes.
How to set it up
Step 1: Open every nearby door
Measure with the front, closet, and cabinet doors in their full operating positions. Include handles, door stops, mats, and the space people need to enter.
Step 2: Count the daily rotation
Keep only the pairs used during the current week at the entry. Move seasonal and occasional footwear to another measured zone.
Step 3: Measure loaded depth and boot height
Use the longest and widest daily shoe, plus the tallest boot, to confirm shelf depth, spacing, and any projection into the walkway.
Step 4: Check stability requirements
Assemble on a level floor, follow loading instructions, and confirm whether anti-tip hardware is required. Do not omit required restraint.
Step 5: Add a wet-shoe zone
Place a removable washable tray or compatible mat where wet footwear can drain and dry without transferring moisture or salt to the rack or floor.
Step 6: Test the real arrival routine
Enter with bags, remove shoes, open nearby doors, and walk through the space. Adjust capacity or placement if the rack creates a new obstacle.
Buying Notes
Loaded rack depth
Compare the shelf depth with the actual footwear. Toe or heel overhang can reduce the walkway even when the frame itself fits.
Door-swing clearance
Measure the full arc and handle position of every nearby door. The rack and loaded shoes should stay outside that operating space.
Stability and base design
Review leveling feet, base width, frame connections, shelf flex, and uneven-load behavior. A slim appearance is not proof of stability.
Anti-tip decision
Follow the exact restraint instructions. If anchoring is required, confirm the wall, fastener, lease, and installation method or choose another unit that can be used correctly.
Boot and large-shoe compatibility
Check vertical spacing, shelf depth, and opening width for the household's tallest and widest footwear. Removable shelves can help only if the product supports that configuration.
Wet-shoe management
Use a removable tray or mat compatible with the floor and footwear. Keep space for airflow and clean salt, grit, and water before they reach the rack joints.
Cleaning access
Confirm that the floor, tray, and lower shelf can be reached without disassembling the unit or dragging a loaded rack.
Common Mistakes
Measuring the wall instead of the door path
A rack can fit the wall and still block an inward-swinging door. Measure movement first.
Counting every shoe as an entryway shoe
The entry works best as a current rotation, not the entire collection. Excess pairs recreate clutter around the rack.
Ignoring loaded overhang
Long shoes can project beyond a shallow shelf. Measure the actual pair, not only the rack dimensions.
Skipping required anti-tip restraint
Do not rely on light contents or a wall lean when the product requires anchoring. Use the system correctly or choose another design.
Putting wet shoes directly on every shelf
Water, salt, and grit can affect the rack and floor. Create a removable wet zone and clean it regularly.
Forgetting tall boots
A rack can fit sneakers and still make boots unusable. Reserve a suitable level or separate tray before buying.
Final Verdict
For a small entry with clear door and walking space, the SoloFave Pick is a slim freestanding shoe rack sized for the current daily rotation. It keeps pairs visible and off the floor without using the depth of a full bench or cabinet.
Confirm loaded depth, stability, anti-tip requirements, boot fit, and a wet-shoe plan. Skip the rack when it narrows a required path or cannot be used safely as assembled.
FAQ
What is the best shoe storage for a small entryway?
For many narrow entries, start with a slim freestanding rack sized for the daily footwear rotation. Confirm the loaded depth, door swing, walkway, stability, and wet-shoe plan before buying.
How do I measure around the front door?
Open the door fully and measure its complete swing, handle, stop, mat, and the path people use while carrying bags. Keep the rack and the longest loaded shoe outside that space.
Does a slim shoe rack need anti-tip hardware?
Follow the exact product instructions. If restraint is required, install it correctly with a compatible wall and lease approval or choose a unit that can be used as directed without an unavailable installation.
How should wet shoes be stored at the entry?
Use a removable washable tray or compatible mat with enough room for drainage and drying. Clean water, salt, and grit before they affect the floor or rack.
Will a slim rack hold tall boots?
Only if the real shelf spacing, depth, and opening fit them. Reserve an open level, remove a shelf only when the product supports it, or keep boots on a separate tray.
How many shoes should stay in the entryway?
Keep the pairs used in the current routine and leave enough empty capacity for normal return. Move seasonal, formal, and occasional shoes to another measured storage zone.
Share this fix
Copy the key takeaway with a source link, or share the full guide.
Related SoloFave Fixes
How to Plan Storage for a Small Apartment
Fix the most crowded storage zone first with one adjustable freestanding shelf, then use room-specific guides for the spaces that need another solution.
Read the guideBest Under-Bed Storage for Small Bedrooms
Use the space under a bed with one low-profile rigid bin, while protecting the floor and keeping stored items easy to retrieve.
Read the guideHow to Hang Lightweight Items Without Drilling in a Rental
Hang lightweight decor and organize cords with one removable mounting system, while avoiding surfaces and loads that make adhesive a poor fit.
Read the guideDisclosure
This page may include paid links. We may earn a commission if you buy through them, at no extra cost to you.