Window, Light & Privacy
How to Make a Bedroom Dark During the Day
An existing blind or curtain can cover most of a bedroom window and still leave the room bright during the day. First identify whether light passes through the material, one narrow gap, or several exposed edges.
This guide is for renters and other residents who want temporary daytime darkness without automatically replacing the covering that is already installed.
Editor
SoloFave Editorial Team
Updated
July 2026
How we picked
Coverage area, material opacity, removable mounting, window access, surface compatibility, storage, and everyday setup risk.
Quick answer
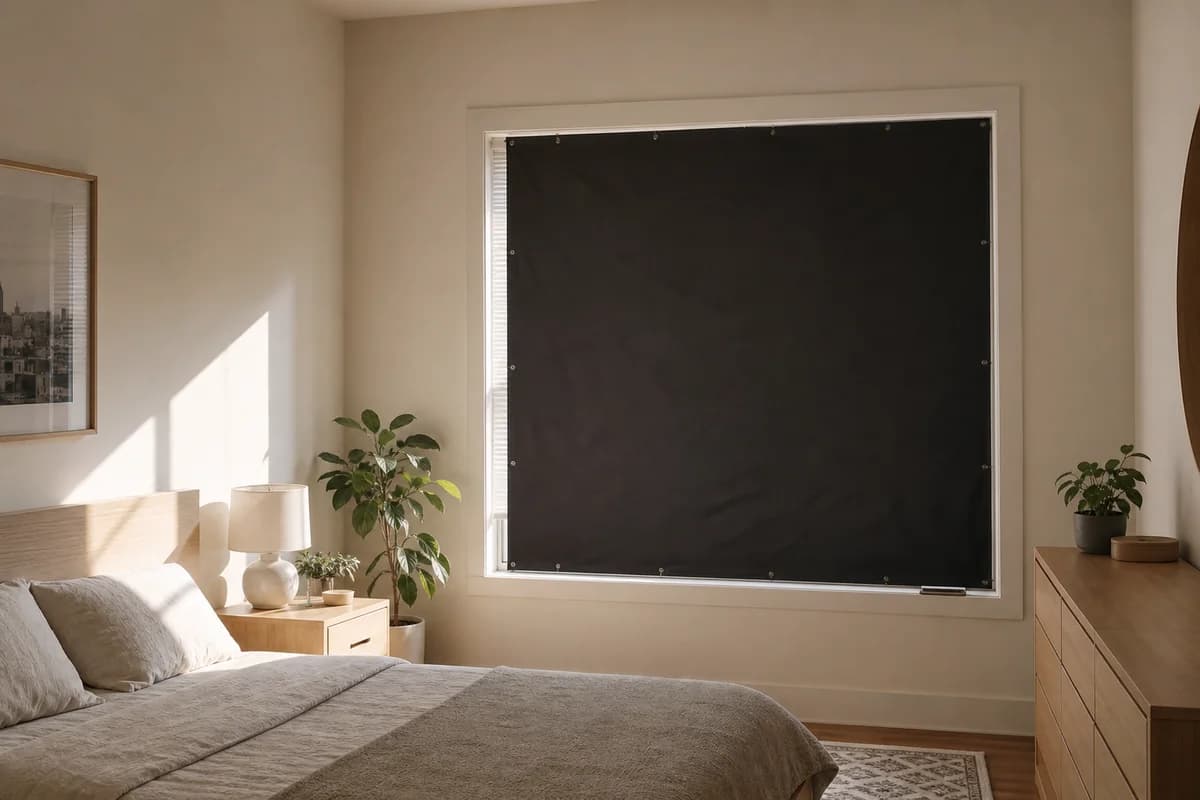
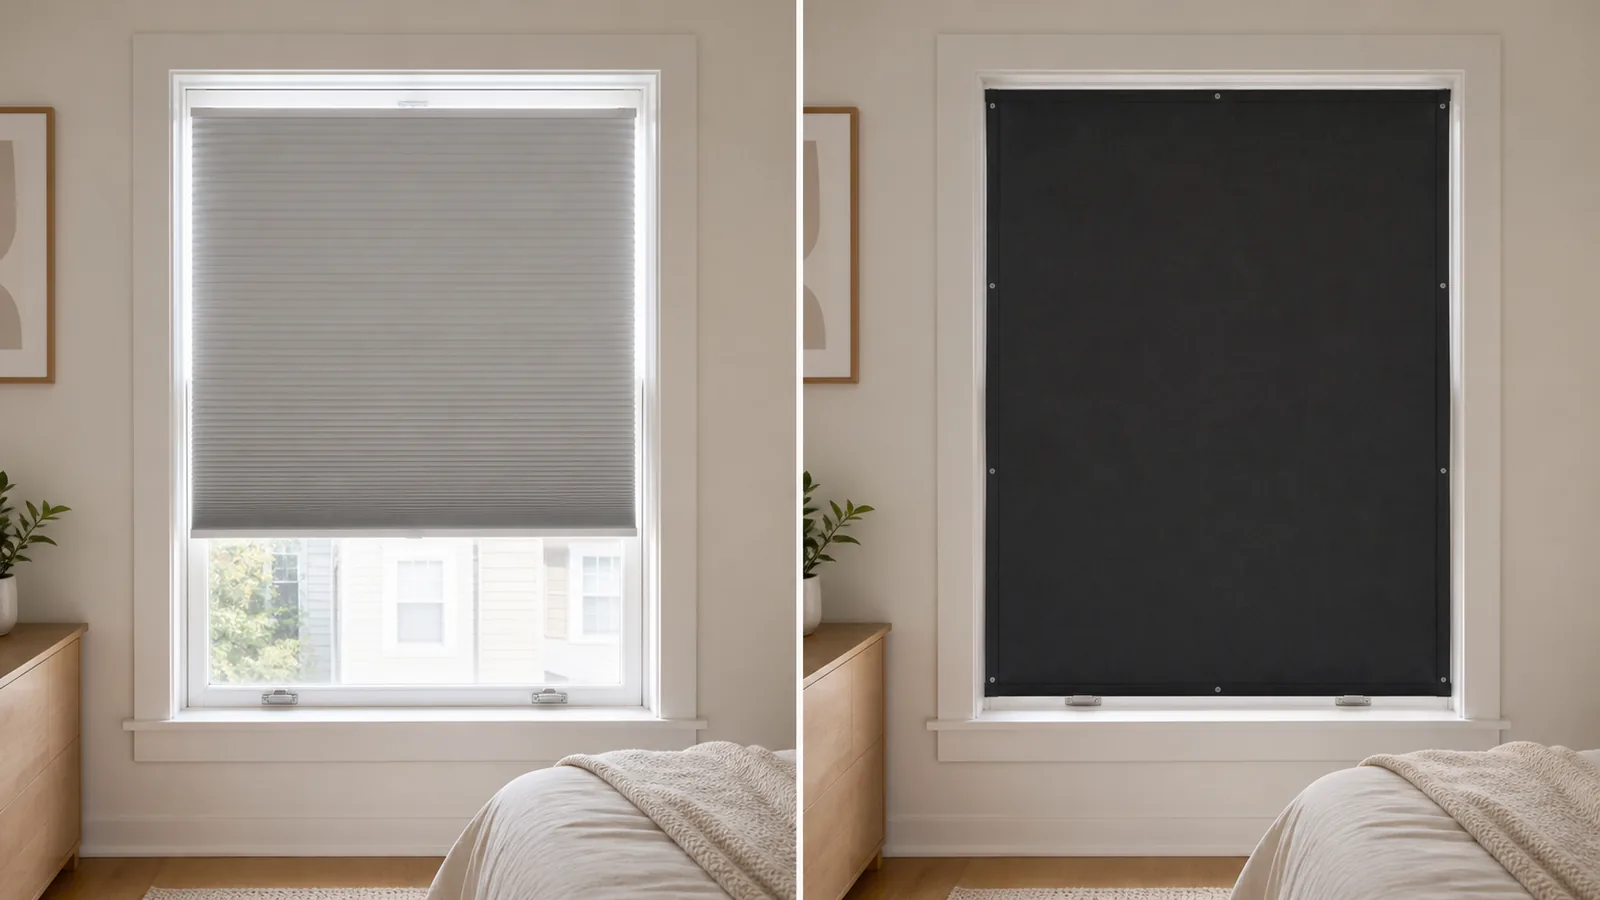
If an existing blind or curtain leaves light around several sides, use a removable full-window blackout panel over the complete usable opening during daytime sleep. This temporary opaque layer sits over or around the current covering rather than necessarily replacing it. It can reduce visible daylight, but cannot guarantee complete darkness. Material opacity, attachment, window shape, fit, and remaining gaps affect the result.
Recommended first
The SoloFave Pick
The one solution we would try first for this specific problem.
- Product type
Removable full-window blackout panel
- Difficulty
- Easy to moderate
- Why this pick
- It covers several light paths at once while leaving the existing blind or curtain installed, and it can be removed when daylight or window access is needed.
Best For
- Shift workers sleeping during the day.
- Nursery nap periods, when the panel and window setup meet applicable child-safety requirements.
- Temporary daytime room darkening.
- Bedrooms with light entering around several edges.
- Renters who cannot add permanent curtain hardware.
- Users who want to keep an existing blind or curtain.
- Windows where the complete usable opening can be covered safely.
The Problem
Inspect the closed covering in the brightest daylight. Check for light through the fabric, left or right side gaps, top or bottom gaps, uncovered trim or glass, reflections from pale surfaces, and an undersized blind or curtain.
The source matters. If the fabric itself transmits light or there is no useful blackout covering, start with the blackout without drilling guide. If the fabric is already opaque and the problem is mainly a narrow glow along the left and right edges, removable strips or side tracks are more targeted; see the light-gap guide.
When several edges remain exposed, a side fix can leave the top, bottom, or other glass bright. That broader coverage problem suits a full-window panel.
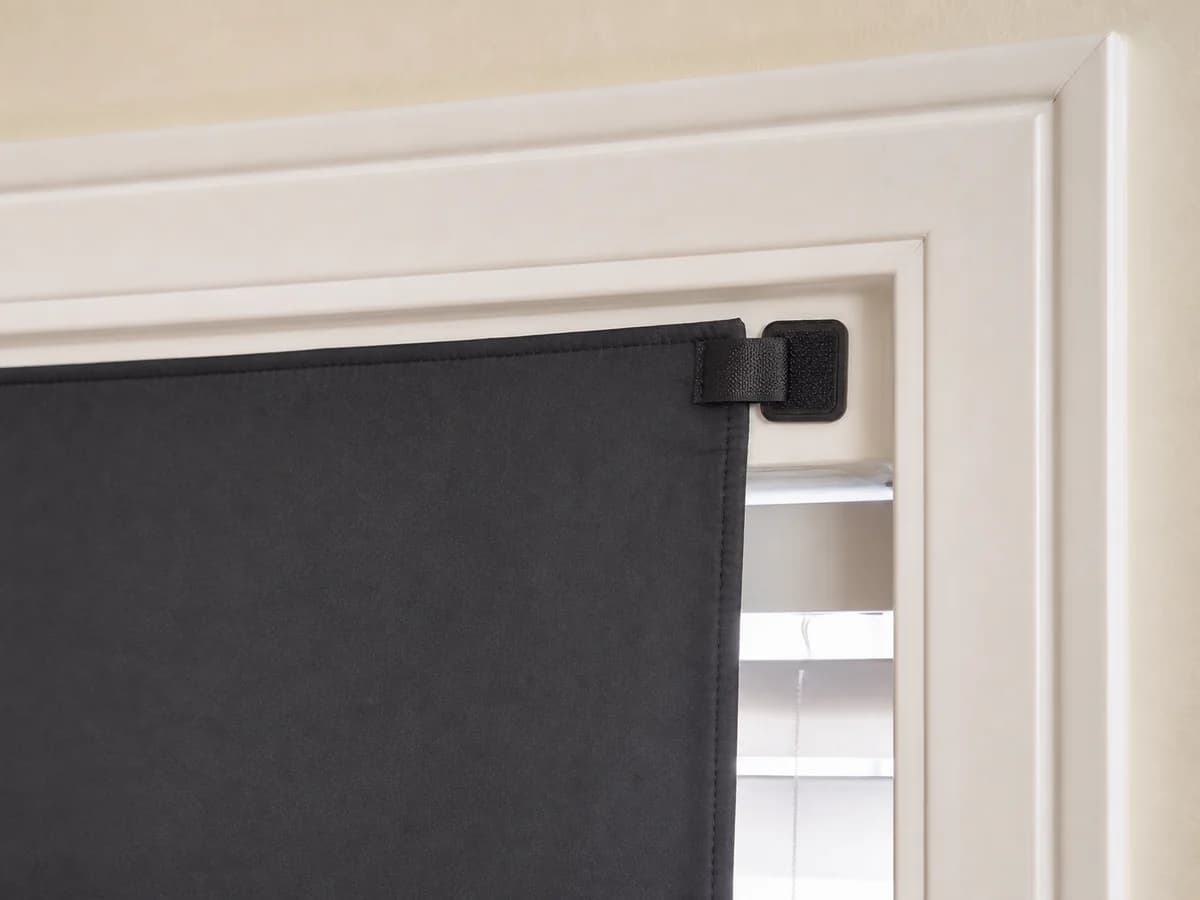
Removable describes how the panel comes down, not a promise of residue-free or paint-safe removal. Check the product's approved surfaces, trimming and reuse limits, and mounting and removal instructions against the frame's finish, condition, texture, cleanliness, and moisture.
Why this is our one pick
- Covers several light paths at once instead of correcting only one narrow side gap.
- Keeps the existing blind or curtain in place.
- Can be removed when normal daylight is wanted.
- Avoids installing a permanent second curtain system.
- Can suit temporary sleeping arrangements.
- Can be folded and stored when the selected panel is designed for reuse.
Alternatives We Compared
Removable blackout strips or side tracks
Use these when opaque blind fabric leaks mainly at the left and right edges. They are targeted and less disruptive, but cannot cover large top, bottom, or uncovered-glass gaps. The light-gap guide explains the fit checks.
New no-drill blackout shade
This is better when the current covering is missing, badly sized, or transmits light. It replaces the inadequate covering instead of layering over it. See the blackout without drilling guide.
Wraparound blackout curtains
These support normal daily opening and closing, but need wall space, suitable support, and unobstructed window operation.
Temporary paper blackout shade
A paper shade can cover a window briefly, but is less practical for repeated operation, removal, and storage.
Reflective or privacy film
Film may help glare or privacy in some conditions, but ordinary film does not necessarily darken a bedroom during the day.
Limitations and who should skip this
- Side-only leakage that blackout strips can target.
- Blind or curtain fabric that visibly transmits light.
- Users needing frequent window access throughout the day.
- Windows requiring immediate emergency-egress access.
- Panels that block locks, handles, sensors, ventilation, or safety hardware.
- Weak, dirty, peeling, damp, textured, or incompatible surfaces.
- Unusual window shapes without a compatible panel.
- Windows requiring product-specific heat, condensation, or glass advice.
- Users expecting guaranteed complete darkness.
How to set it up
Step 1: Close the existing covering
Lower the existing blind or close the curtain.
Step 2: Inspect in strong daylight
Inspect the window during the brightest part of the day.
Step 3: Find every light path
Identify every major light path rather than focusing on the most obvious edge.
Step 4: Measure the coverage area
Measure the complete area requiring coverage.
Step 5: Read the instructions
Review the exact mounting and removal instructions.
Step 6: Test-position the panel
Place the complete panel before attaching it and check the planned coverage.
Step 7: Protect window access
Keep locks, handles, sensors, ventilation, and emergency access usable.
Step 8: Use the approved method
Install using the mounting method approved for the selected panel and surface.
Step 9: Recheck the room
Recheck the result during strong daylight and look for remaining gaps.
Step 10: Remove and store
Remove and store the panel when normal daylight or window access is needed.
Buying Notes
Complete coverage
Measure the full area, not only the existing blind fabric.
Measurement area
Confirm whether the maker specifies glass, frame, trim, or wall area.
Deduction rules
Do not make your own measurement deduction unless the product requires one.
Material opacity
Choose opaque blackout material, not merely dark-colored fabric.
Panel thickness
Check flatness, folding, storage, and clearance around the existing covering.
Attachment method
Match tabs, suction attachments, or magnets to the stated surface and window.
Approved surfaces
Compare the actual finish, texture, moisture, and condition with product limits.
Removal instructions
Read them before installation and use the intended method.
Trimming
Confirm whether cutting affects edges, attachments, or returns.
Reuse
Check whether the panel and mounts support reuse or one installation.
Storage
Confirm the folded size fits the available storage space.
Window access and safety
Plan the panel and removal path so locks, handles, cranks, cords, sensors, ventilation, and any required emergency exit remain immediately usable.
Color and compatibility
Check room-facing color and window or glass restrictions. For a broader mount comparison, use the renter-friendly window-covering guide.
Common Mistakes
Measuring only the existing blind fabric
The required panel may need to cover exposed frame or trim as well.
Covering only the glass
Bright frame gaps can remain visible even when the glass is covered.
Buying a panel that is too small
A narrow panel can create the same uncovered edges the project is meant to address.
Assuming removable means damage-free
Surface condition, attachment type, and removal instructions still matter.
Blocking window access
Do not cover controls, ventilation, sensors, or a required exit with an attachment that cannot be released immediately.
Using a weak or incompatible surface
Peeling paint, moisture, texture, or unsupported finishes may not suit the mount.
Leaving folds or loose corners
Poorly seated edges can create new light paths.
Ignoring light through thin fabric
An outer panel does not make the existing blind or curtain itself opaque.
Ignoring removal and storage
A panel is less useful for daily routines if it is difficult to take down, fold, or store.
Leaving the panel installed all day
Remove it when ventilation, daylight, window inspection, or access is required.
Final Verdict
When several edges of an existing covering stay exposed, a removable full-window blackout panel is the most direct temporary first Pick. It covers the larger opening while the blind or curtain stays.
Side-only leakage is better suited to blackout strips, while fabric that transmits light may require a replacement blackout covering. If the concern is nighttime visibility rather than daytime darkness, use the nighttime window privacy guide. In every case, safe window operation, ventilation, required egress, and product-specific surface guidance take priority over darkness.
FAQ
How can I make my bedroom dark during the day?
Identify whether daylight passes through or around the covering. If opaque material leaves several sides exposed, a removable full-window panel can cover the usable opening temporarily. Fit and remaining gaps affect the result.
Can I put a blackout panel over existing blinds?
Often, if the panel supports that arrangement and leaves clearance for the blind and hardware. Follow its measuring and mounting instructions, test-position it, and keep locks, ventilation, sensors, and required egress usable.
Is a full-window blackout panel better than blackout strips?
It depends on the light path. Use a full-window panel for several exposed sides or sections. Use strips or side tracks when an opaque blind leaks mainly at the left and right edges.
Will a removable blackout panel damage paint or window frames?
Results vary with the attachment, finish, surface condition, moisture, preparation, and instructions. "Removable" does not guarantee residue-free or damage-free removal. Use approved surfaces and read the removal process first.
Can I use a blackout panel on an emergency-egress window?
Window access comes first. Do not prevent immediate use of a required emergency exit or hide its hardware. Check applicable requirements, lease rules, and product instructions; choose another option if quick removal is uncertain.
What should I do if light still comes through the curtain or blind?
If light passes through the material, the underlying covering is not opaque; a properly sized blackout shade or curtain may be the better long-term fix. For side-only leakage, use a targeted gap solution.
Share this fix
Copy the key takeaway with a source link, or share the full guide.
Related SoloFave Fixes
How to Black Out a Bedroom Without Drilling
Make a rental bedroom darker with one no-drill shade, while checking measurements, edge gaps, window hardware, and removal requirements.
Read the guideHow to Stop Light Leaking Around Blackout Blinds
Stop side-edge light from slipping around blackout blinds with one removable, renter-friendly fix.
Read the guideHow to Get Nighttime Window Privacy Without Drilling
Improve nighttime window privacy with one opaque no-drill shade while checking lighting conditions, edge coverage, and rental compatibility.
Read the guideHow to Choose a Renter-Friendly Window Covering
Match the room's real window problem to one compatible no-drill covering, with clear checks for fabric, fit, mount, hardware, and removal.
Read the guideDisclosure
This page may include paid links. We may earn a commission if you buy through them, at no extra cost to you.