Window, Light & Privacy
How to Choose a Renter-Friendly Window Covering
A rental window can need darkness, nighttime privacy, softer daylight, better comfort near the glass, or simply a cleaner replacement for a poor existing blind. These are different jobs, and the same fabric or mounting method does not solve all of them.
Start by naming the primary problem and inspecting the frame, glass, existing hardware, lease, and likely viewing or light paths. That diagnosis narrows the covering before style and price enter the decision.
Editor
SoloFave Editorial Team
Updated
July 2026
How we picked
Problem fit, fabric opacity, mount compatibility, frame depth, edge coverage, surface and lease risk, window operation, and daily use.
Quick answer
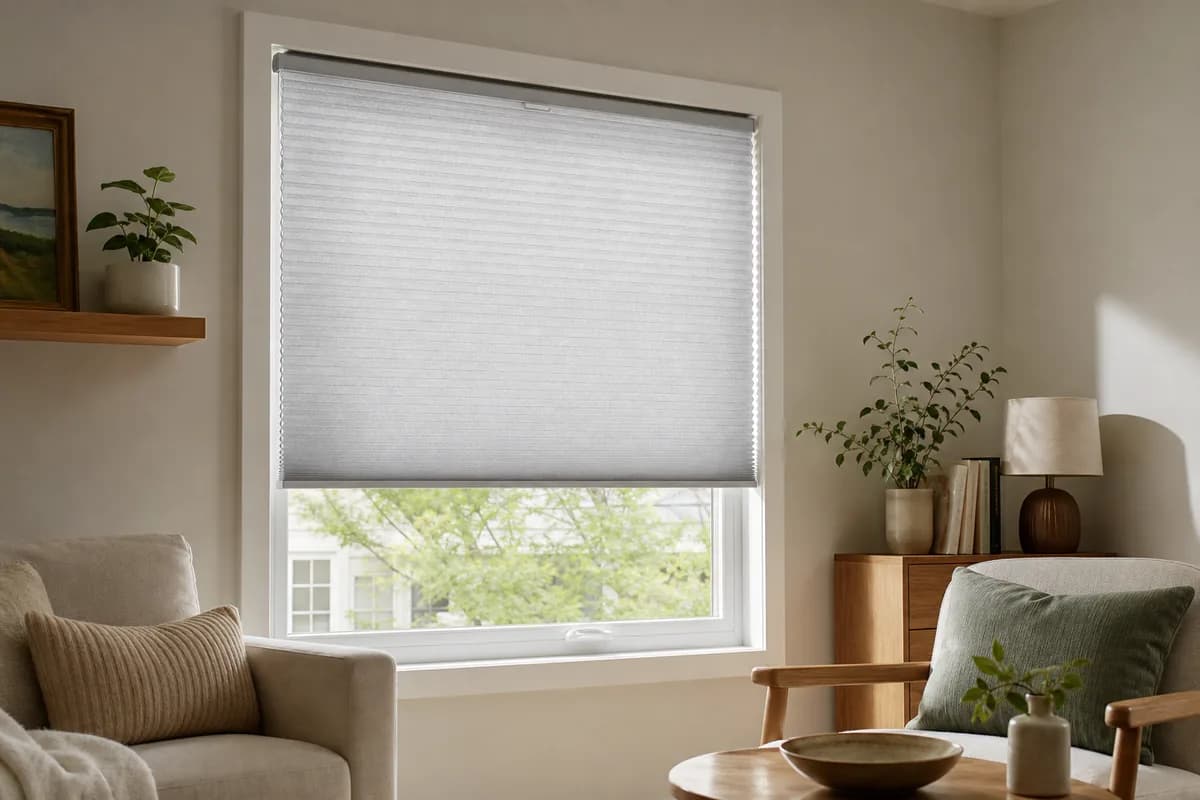
For many compatible rental windows, a no-drill cellular shade is the default first pick when its mount and fabric match the main need, but it is not a universal answer for every frame or coverage problem.
Recommended first
The SoloFave Pick
The one solution we would try first for this specific problem.
- Product type
No-drill cellular shade
- Difficulty
- Easy
- Why this pick
- It is a practical default first pick for many compatible rental windows because it offers adjustable coverage in light-filtering, opaque, and blackout versions, but the frame, mount, and coverage need must still match.
Best For
- Renters who can identify one primary need before choosing the fabric.
- Compatible windows with enough frame depth or surrounding surface for the selected no-drill mount.
- Bedrooms, living rooms, offices, and other spaces that need adjustable coverage.
- People choosing between light-filtering, opaque privacy, and blackout versions.
- Windows whose locks, handles, ventilation, and required egress can remain usable.
- Temporary homes where the lease permits the exact installation and removal method.
The Problem
Window-covering labels can hide important differences. Blackout material is selected for darkness, opaque privacy material blocks a direct view through the fabric, light-filtering material softens daylight, and cellular construction may improve comfort near a sound window. None of those labels guarantees complete edge coverage or compatibility with a particular frame.
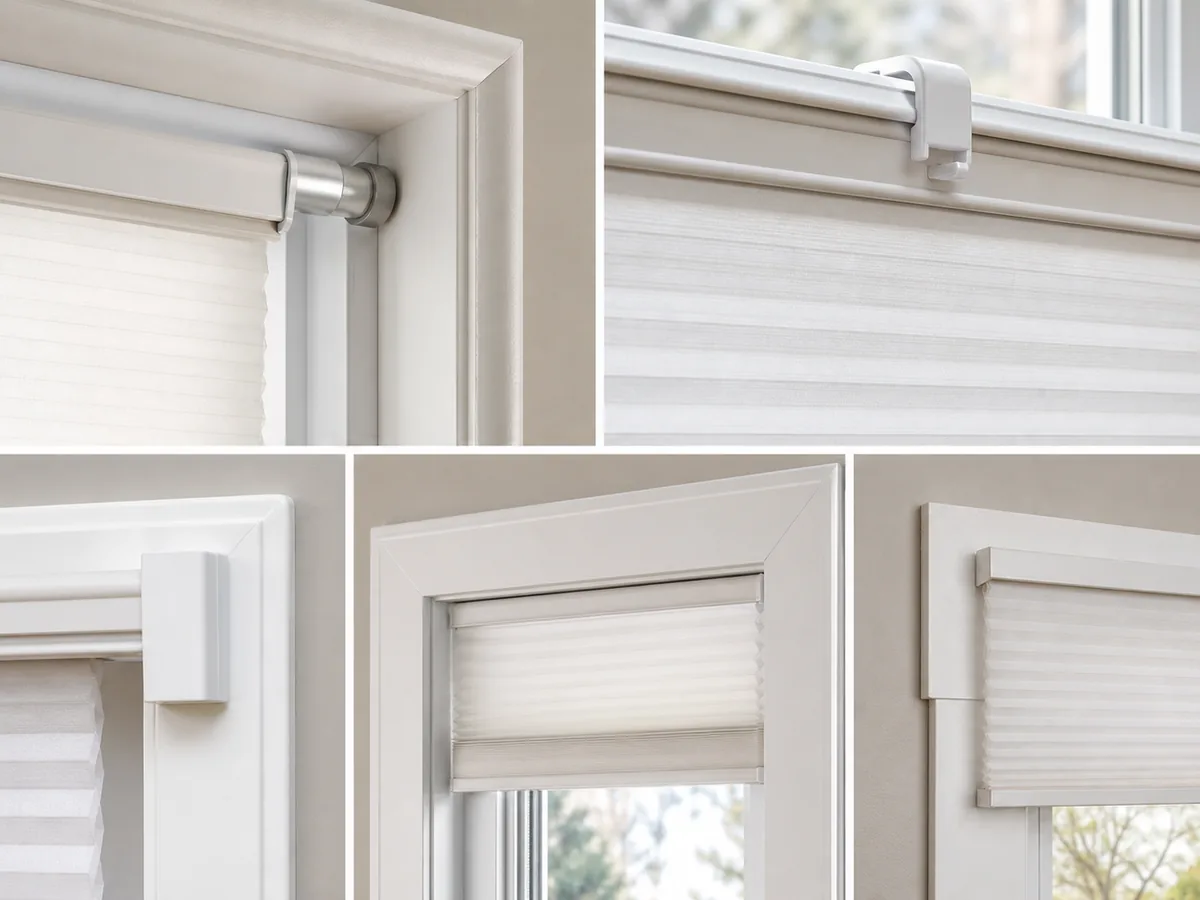
Mounting choices also shift the risk. Tension and compression systems need reliable opposing surfaces and stated dimensions. Clip-on systems need compatible existing hardware or trim. Adhesive systems depend on the exact finish, preparation, room conditions, and removal method. Inside mounts need frame depth and can leave edge gaps; outside mounts can overlap more of the opening but need usable surrounding surface and lease approval.
The window must still work after installation. Keep locks, handles, cranks, ventilation, controls, and required emergency access available, and consider what the covering looks like from outside if the building has exterior-facing rules.
Why this is our one pick
- It is a useful default starting point for many compatible rental windows, not a universal answer for every frame, lease, or coverage problem.
- It opens and closes for daily use, unlike a permanently applied opaque film or removable panel.
- No-drill versions can suit compatible frames without making a drilled curtain-rod installation the first step.
- Manufacturer instructions provide a concrete way to compare frame depth, size limits, mounting contact, and removal requirements.
- Specialized guides can take over when the main issue is bedroom blackout, nighttime privacy, thermal comfort, or light leaking around an existing blind.
Mounting and Coverage Options Compared
Tension or compression mount
This avoids adhesive and drilled fasteners, but it requires the stated frame depth, opposing surfaces, dimensions, and contact area. Excess pressure or poor fit can mark, shift, or fail on an incompatible frame.
Clip-on mount
A clip can use compatible existing blinds, trim, or a frame edge. Check thickness, load direction, clearance, stability, and whether the clip could interfere with the original hardware.
Adhesive mount
Adhesive can work on an approved smooth surface, but paint quality, texture, moisture, preparation, waiting time, and removal method affect the result. Do not assume a removable label makes every finish suitable.
Inside mount
An inside mount keeps the covering within the frame and can look compact. It needs usable depth, may reduce clearance around hardware, and commonly leaves some uncovered space at the sides.
Outside mount
An outside mount can overlap the frame for more coverage, but it needs suitable trim or wall area and may require a different no-drill or approved permanent mounting method. Check lease and exterior-view rules.
Limitations and who should skip this
- Windows with weak, damaged, shallow, sloped, heavily textured, or otherwise incompatible mounting areas.
- Very large, angled, arched, or multi-panel openings outside the product's supported size or shape.
- Rooms where decorative curtains and layered fabric are the primary design goal.
- Windows where a shade would block a lock, crank, ventilation opening, or required escape path.
- Situations where the building requires a specific exterior appearance or installed treatment.
- Problems caused only by narrow edge gaps around an otherwise suitable blind; those may need a separate fit solution.
- Any installation prohibited by the lease or product instructions.
How to set it up
Step 1: Name the main job
Choose one priority: darkness, nighttime privacy, softer daylight, comfort near the window, or correction of an edge gap. Use the specialized guide when that problem needs more detail.
Step 2: Inspect the full opening
Note the glass, frame depth, trim, seals, existing blind, handles, locks, cranks, ventilation, adjacent panes, and likely sightlines.
Step 3: Choose inside or outside coverage
Decide whether the covering should sit within the frame or overlap it. Compare coverage, depth, surrounding surface, hardware clearance, and lease rules.
Step 4: Match the no-drill mount
Use only a tension, compression, clip, or adhesive system approved for the actual frame and dimensions. Read installation and removal instructions before ordering.
Step 5: Measure by the maker's method
Measure every point required by the selected product and follow its rules for rounding, deductions, overlap, and operating clearance.
Step 6: Install and test the real problem
Operate the shade repeatedly, check all window hardware, then evaluate darkness, privacy, glare, or comfort under the conditions that caused the problem.
Buying Notes
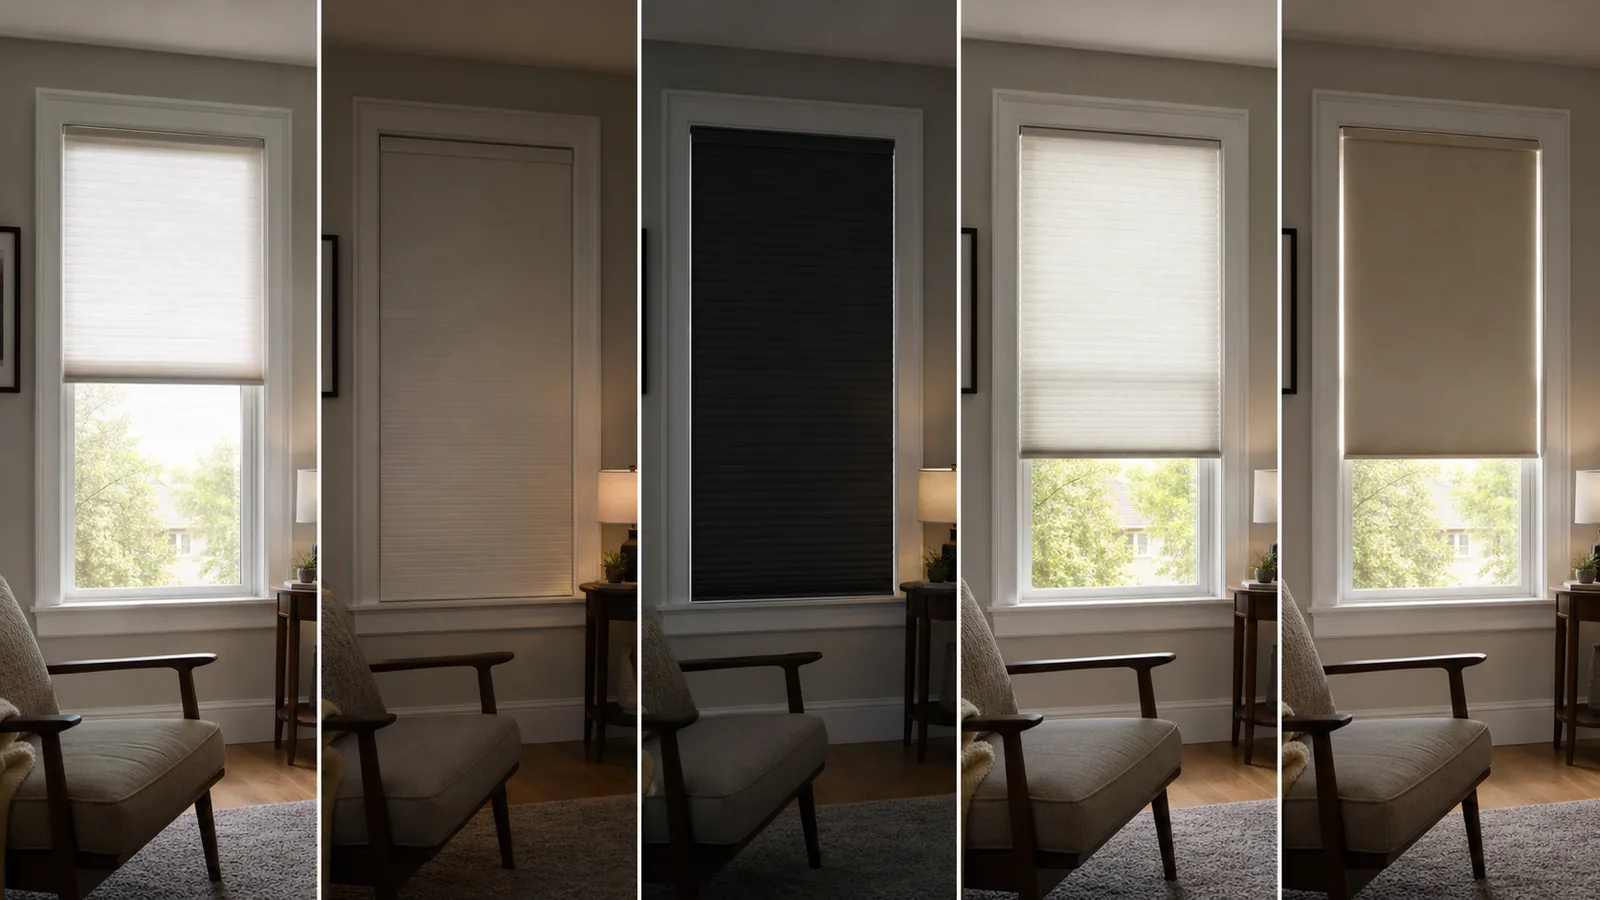
Blackout need
Choose a version specifically described as blackout and evaluate edge coverage. For a bedroom-first decision, use the blackout guide.
Nighttime privacy need
Choose physical opaque coverage and check realistic viewing angles. Reflective film depends on lighting conditions; the nighttime privacy guide explains the distinction.
Thermal-comfort need
A close-fitting cellular shade may be a reasonable first covering for a sound window, but results vary with fit, window construction, climate, and installation. See the thermal window guide.
Light-filtering need
Use light-filtering fabric when softening glare and preserving daylight matter more than darkness or nighttime opacity. Check how the material looks after dark before treating it as privacy coverage.
Edge-gap need
If the existing blind works but narrow strips of light remain, replacing the fabric may not address the real issue. Review the light-gap guide.
Mount and surface limits
Compare the exact tension, clip, adhesive, or compression method with the frame material, depth, finish, room conditions, stated size limits, and lease.
Control and child safety
Prefer a practical cordless control where possible, or follow the current safety instructions for cords and tension devices. Keep the control reachable without obstructing the window.
Removal and replacement parts
Read the removal process before installation and check whether brackets, clips, adhesive strips, or controls can be replaced without buying the whole shade again.
Common Mistakes
Choosing the product before naming the problem
A popular shade can still be wrong if the room needs nighttime opacity, edge-gap control, or thermal coverage rather than softer daylight.
Treating every no-drill mount as interchangeable
Tension, clip, adhesive, and compression systems use different surfaces and load paths. Confirm the exact method instead of shopping by the no-drill label alone.
Ignoring inside- versus outside-mount tradeoffs
Inside mounts need depth and can leave gaps. Outside coverage can overlap more glass but needs surrounding area and permission.
Assuming light-filtering material provides nighttime privacy
Light-filtering fabric can transmit silhouettes or room light. Check the opacity needed for the actual evening conditions.
Blocking window operation
Do not cover locks, handles, cranks, ventilation, or required egress. Test the window with the shade raised and lowered.
Assuming removal is risk-free
A no-drill product can still affect an incompatible finish or original blind. Follow the surface and removal instructions and document the rental condition.
Final Verdict
For many compatible rental windows, the SoloFave Pick is a no-drill cellular shade chosen only after identifying the main job. It is a default starting point for adjustable light-filtering, opaque privacy, or blackout coverage, not a universal answer for every frame.
Move to a specialized solution when the problem is an edge gap, an unusual opening, a thermal issue that begins with a faulty window, or a mount the frame cannot support. The best renter-friendly choice is the one that fits the problem, frame, lease, and normal window operation together.
FAQ
What is the best renter-friendly window covering?
For many compatible rental windows, start with a no-drill cellular shade in the fabric type that matches the main need. Check the exact mount, frame depth, measurements, hardware clearance, lease, and removal instructions.
Should renters choose blackout, privacy, or light-filtering fabric?
Choose blackout for a darker room, opaque material for a more consistent physical privacy barrier, and light-filtering material for softer daylight. Some products combine benefits, but confirm the exact fabric rather than relying on the shade style alone.
Which no-drill mount is safest for a rental window?
There is no universal safest mount. Tension, compression, clip, and adhesive systems each require compatible dimensions, surfaces, loads, and removal methods. Use the exact product instructions and lease to decide.
Is an inside mount or outside mount better?
An inside mount looks compact but needs frame depth and may leave edge gaps. Outside coverage can overlap more of the opening but needs suitable surrounding surface and permission. The window and primary problem decide.
Can one renter-friendly shade improve thermal comfort?
A close-fitting cellular shade may help a room feel more comfortable near a sound window, but results vary significantly with window construction, fit, climate, and installation. It does not repair drafts, moisture, or failed window components.
What if the existing blind works but light leaks at the sides?
Treat that as an edge-gap problem first. Confirm that the blind is level and moving correctly, then use the light-gap guide to decide whether removable side tracks fit.
Share this fix
Copy the key takeaway with a source link, or share the full guide.
Related SoloFave Fixes
How to Black Out a Bedroom Without Drilling
Make a rental bedroom darker with one no-drill shade, while checking measurements, edge gaps, window hardware, and removal requirements.
Read the guideHow to Get Nighttime Window Privacy Without Drilling
Improve nighttime window privacy with one opaque no-drill shade while checking lighting conditions, edge coverage, and rental compatibility.
Read the guideHow to Insulate Rental Windows Without Drilling
Make a hot or cold rental room more comfortable with one close-fitting window covering that installs without permanent drilling.
Read the guideHow to Stop Light Leaking Around Blackout Blinds
Stop side-edge light from slipping around blackout blinds with one removable, renter-friendly fix.
Read the guideHow to Make a Bedroom Dark During the Day
Create a darker bedroom for daytime sleep with one removable covering that blocks light around the full window opening.
Read the guideDisclosure
This page may include paid links. We may earn a commission if you buy through them, at no extra cost to you.